[ad_1]
Flawless editing requires master or professional skills. Skills alone are not good enough in this regard. The type of editor you are going to choose also matters and is of great importance. This is because the speed and effort you are going to put into the editor will determine its feasibility. Less effort in creating error-free designs ultimately contributes to high design speeds. The CapCut online photo editor is really in favor in this regard.
First, you don’t have to pay anything to use the tool. You can get an idea from it transparent background maker feature of the CapCut online photo editor. It allows you to generate a transparent background with one click. Secondly, the tool’s interface is intuitive and every single function has the proper layout, which is super easy to understand and use even for beginners.
What does CapCut’s commitment to impeccable design reflect?
The modern features of the CapCut online photo editor reflect its commitment to impeccable designs:
Use text
Many tools exist that cater to this feature, but not in the way that the CapCut online photo editor does. You can’t use the text, but you have complete freedom to customize it. There are several pre-made formats for the header text, subtitle text and body text. You can make the text bold for everyone. Apart from this, you can also adjust the letter spacing and line spacing. There is an option to change the color of the text to your liking. You can use these variations for advertisements, banners, cards, product images, etc. A combination of these elements will make your design very noticeable and convey the message you want to convey.
Bulk image tools
The CapCut online image editor offers you several tools to edit your images. Some of the most important tools are opacity, effects, arrangement, adjustment, etc. These features allow you to change the arrangement of your image. If there are more than 2 images, you can overlap. You can also change the brightness level, the level of blurs, shadows and tints. In addition, there are also the filters and effects, which remove the burden of additional image adjustments. You can access and use any tool you want from the main interface of the CapCut online photo editor.
Shapes and lines
The shapes section in the far left vertical column contains a plethora of shapes that you can use in your design. By combining these shapes you can create a unique design. If you need a special shape, you can draw one or make one yourself using the lines. There is an option to adjust the line thickness to suit your needs. You can transform the shapes into both dotted and continuous shapes. The main areas of application of shapes are logos, websites and infographics. You can also take care of the design of the infographics in this way.
Use stickers
There are many types and variations of stickers that you can use in your designs. In the far left vertical column there is a tab or button. You can access these stickers via this tab. There are more than 400 stickers to choose from. Each of the available stickers is different from the other. The CapCut online photo editor gives you complete freedom to edit these stickers as well. You can change the brightness of the sticker, change the shape of the sticker and also change the saturation. Stickers enhance your designs. Use them to make your image stand out from the rest.
The ABCs of using the CapCut Online Photo Editor
Using the CapCut online photo editor is super easy. Use it to sharpen image or increase its appearance via these steps:
- Before you start the editing process, you need to join the toolkit. To do this, first visit the CapCut main website. Later, go to the tools tab in the top menu bar. Hover your mouse over it and a menu will appear. Select the online photo editor from the list. With CapCut you can do this by using your other accounts such as FB, TikTok or Google. With these accounts you can join the CapCut in just a few clicks.

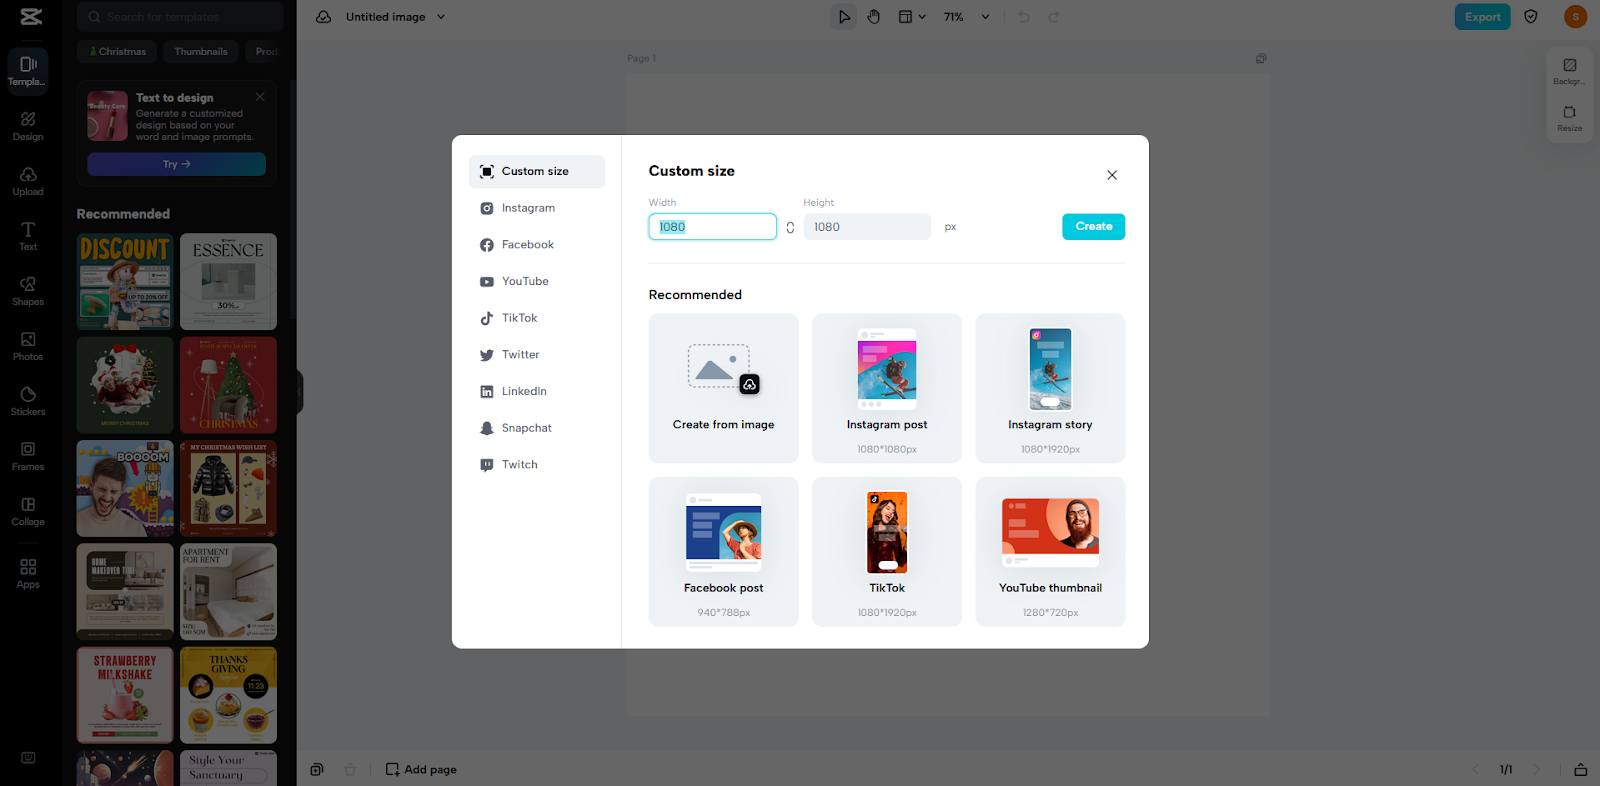
- Once you join, import the file you want to edit or choose the new file size. For upload access, the left vertical column contains the upload tab. You can import it from Google Drive or Dropbox. On the other hand, if you don’t want to use the file, select the size for any social media platform you want.
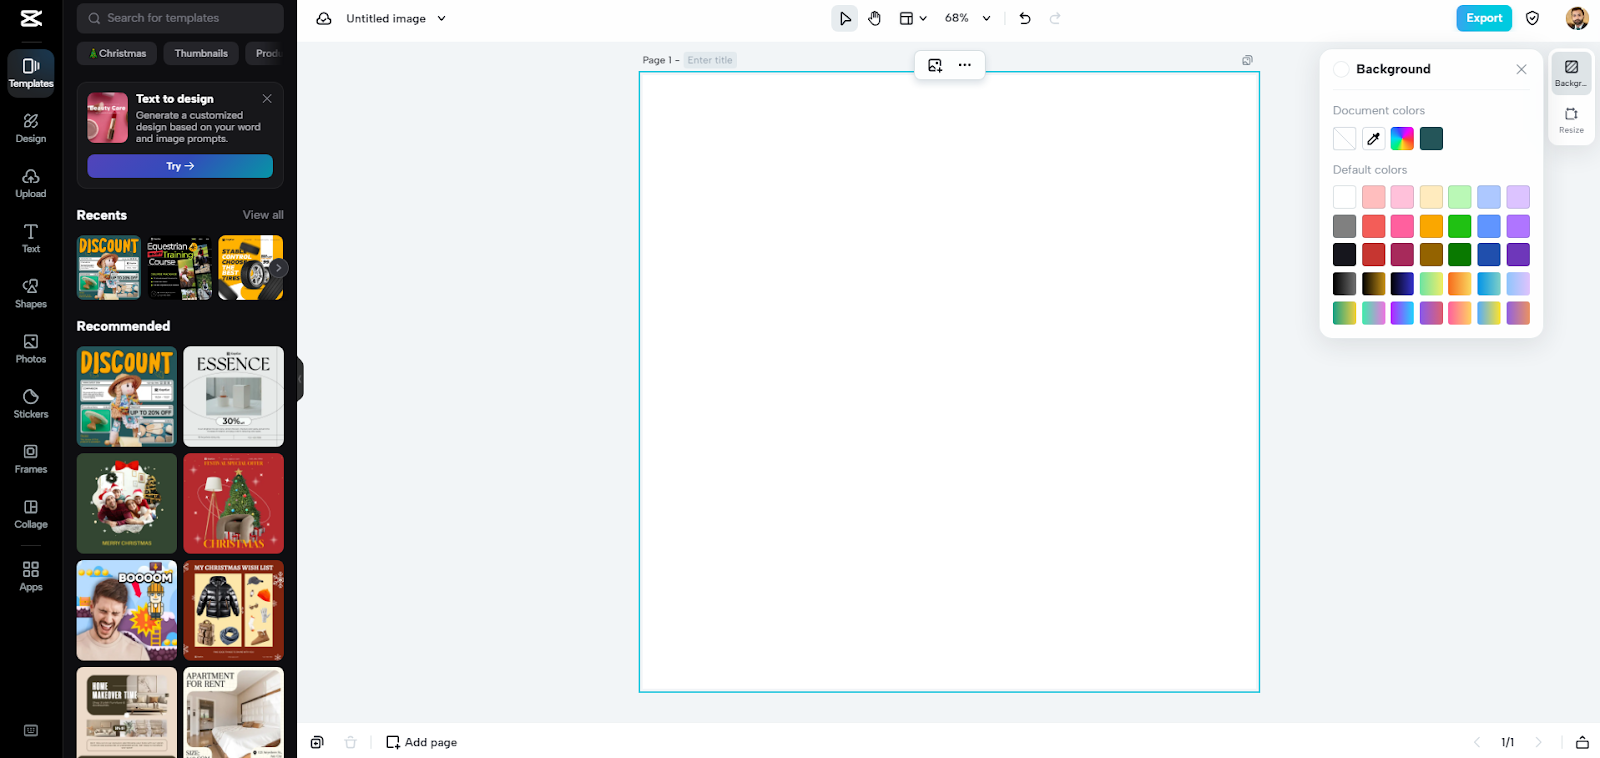
- Later in the steps comes the editing part. Adjust your image the way you want by using the various features and functions of the CapCut online photo editor. Change the color effects, add borders or text, adjust the image style, etc. You can do anything. Just use your thought process for this.
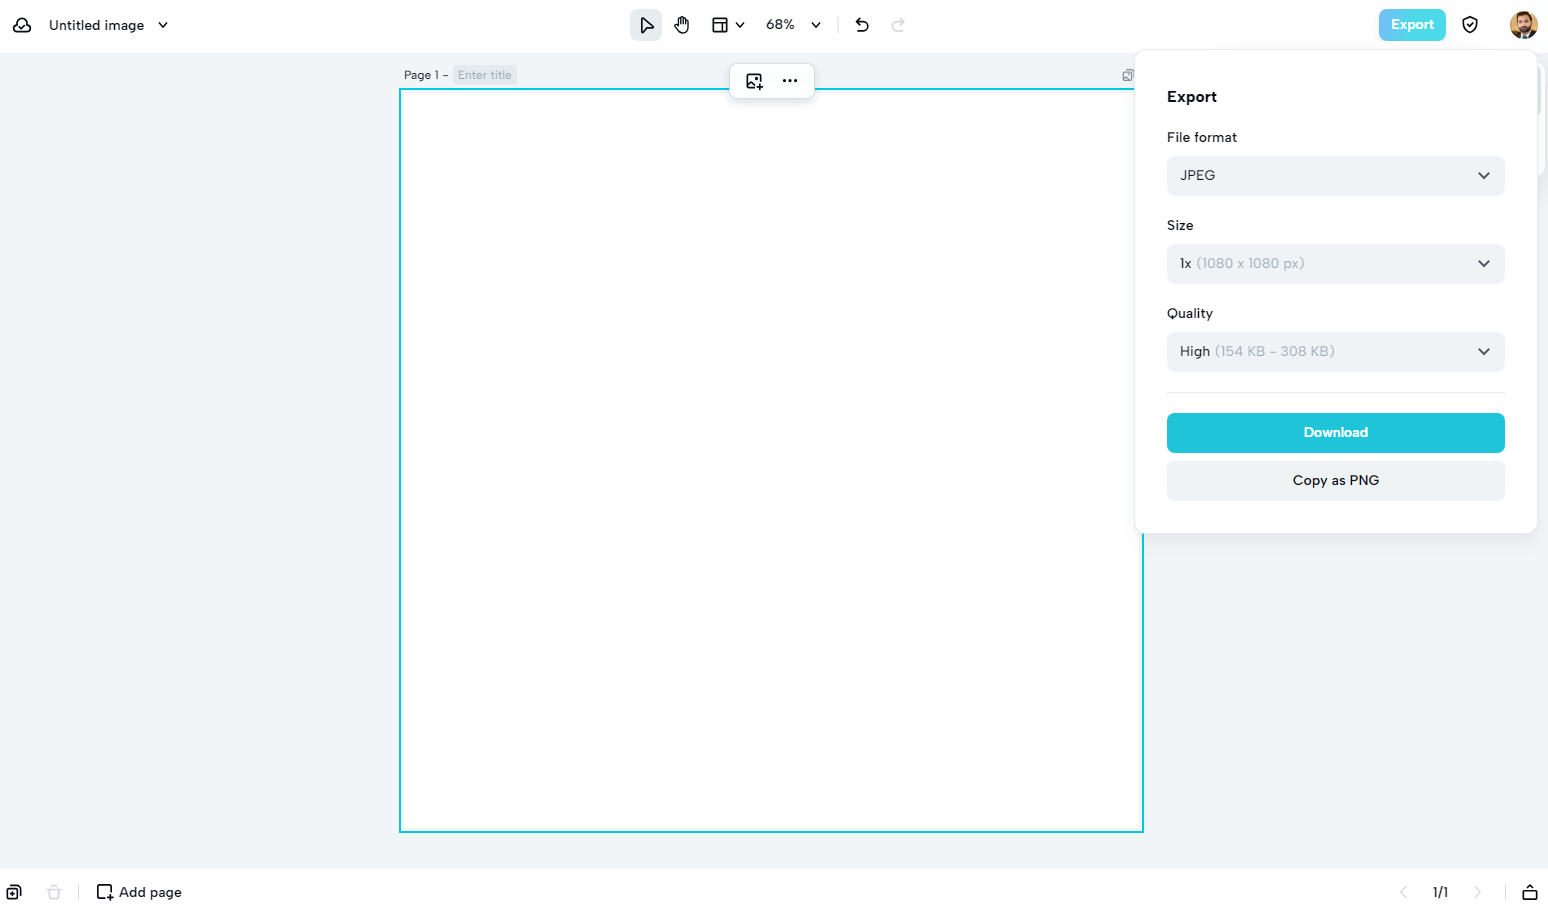
- Finally, downloading comes. There is an export tab in the top right corner. Go to this tab and click on it. A menu will appear. This menu allows you to set or change the image format, file size and quality of the file. If you don’t want to adjust these settings, simply click on the download tab to have your image file on your device.